I believe many out there already know about the existence of the camera settings I am going to show you, but those who don't: this is really the no. 1 key to getting accurate colors in photos! And color accuracy is of course of great importance when it comes to nail polishes. I'm talking about white balance.
Just to keep this post from being too picture heavy, I'll be dividing all this into two posts. Today I'll show you how it may look if you're using a compact camera model, and tomorrow I'll show you a system camera, or SLR, if you prefer that term.
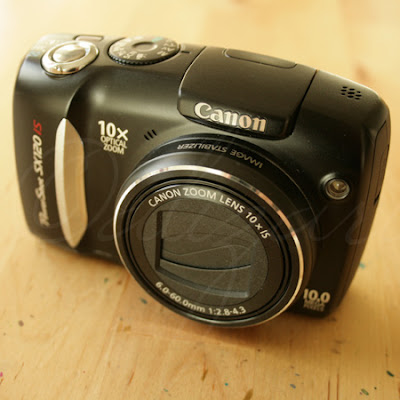
Let's get started. This is the camera I personally use for my swatch and NOTD photos. It's handy and not too heavy, and it is a pretty basic compact camera with a price tag around 2000 SEK/$300. And yes, I am a Canon gal, but the same functions may be found in most compacts in this price range.
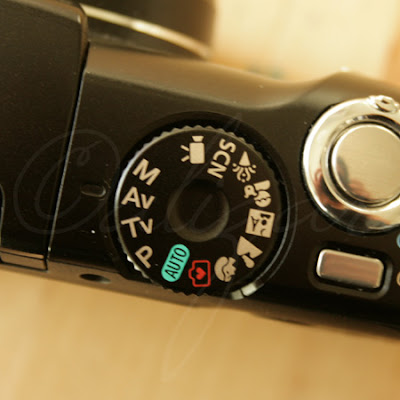
The first thing you should do, is try to use one of the camera's semi-manual programs. The white balance can not be customized in the other programs. I always use the custom aperture program, marked Av, that will let you adjust aperture to create a desired sharpness depth. If you instead use the program marked Tv, you can adjust the shutter speed, and aperture will adapt to the surrounding lighting conditions.
Let's take a look at the back of the camera.
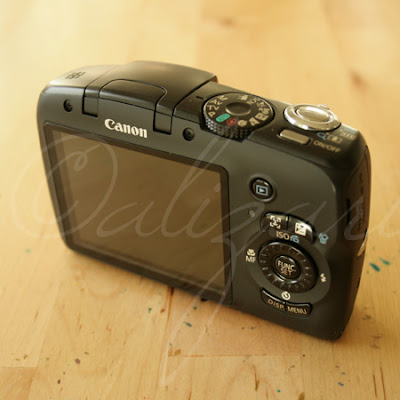
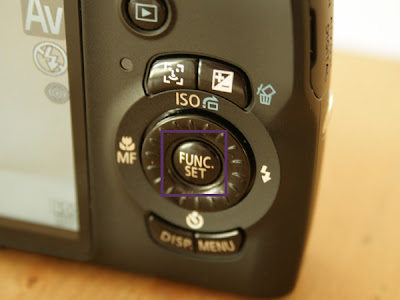
The settings in which you may adjust the white balance is found in the photo settings menu available somewhere in the area where you may also adjust ISO and such. In this case, it is found at the Functions button. Your camera may have the abbreviation WB printed close to a button, then there's where you'll find the settings.
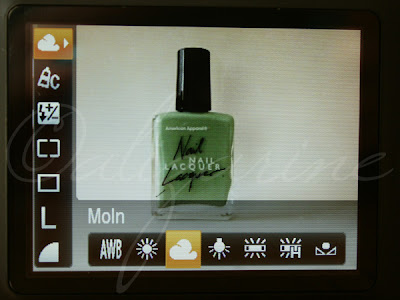
Once you get into the settings menu, this is what you will probably find. Near the settings for photo dimensions, image resolutions et cetera, you will find a menu marked WB, or possibly with a symbol of the chosen setting. In this case, Cloudy is marked.
In the white balance menu, you will find various settings for different lighting conditions. Now the trick is to find the one that best matches the light you have. If it's late and you didn't have time to snap daylight swatches, you may be in a room with tungsten bulb lighting, or you may have a fluorescent light in your bathroom that gives you better conditions for taking your swatches. Then choose the symbol best applicable for that. An overcast day will also severely alter your lighting conditions, however, picking the Cloudy setting will still provide you color accurate swatching possibilites!
In this case, the following options are available: Automatic white balance, Daylight, Cloudy, Tungsten, Fluorescent, and Halogen Light.
To show you the vast difference between each setting, I made a little preview chart, using a random nail polish bottle, set on a sheet of standard white printer paper. Behold! (Click to enlarge.) Can you guess what lighting conditions I shot these in?
 Auto, Daylight, Cloudy, Tungsten, Fluorescent and Halogen. The image above should make it very clear how much the correct settings will mean to the accuracy of your photos!
So, why not just use the Automatic setting? Well, you may, but using a non-professional digital camera and shooting in JPG format, sadly the AW setting won't provide you with the true color.
I really hope some of you found this helpful! Since this is a completely new kind of post in this blog, I would very much like to know your reactions to it. Please either leave a comment, or check one of the reactions boxes below the post!
Swedish word of the day:
fotograf -noun photographer
Because it seemed appropriate.

Wow, so helpful. Great post!
ReplyDeleteI love (& need!) photography tips. I'm going to read this in more detail when I'm hope & can dork around with my camera as I read =)
ReplyDeleteCool! I have the excact same camera, but how do you get the macro function to work together with the AV function? :iz stupid: (I just bought mine, had a Olympus before)
ReplyDeleteAlisa and Colette: I'm glad to see it's appreciated, and good luck playing around with your cams! :)
ReplyDeleteneglelakkmani: Using several customized settings together is no problem in the manual programs. :) Just do both in whatever order you like! :D ('Cuz you've found the macro option, right?)
Ah, gotcha! Thank you! :D
ReplyDeleteGreat post! I am bookmarking it for study when I am feeling better.
ReplyDeleteThis is a fantastic post! Thanks so much! I'm still trying to figure out my camera and this seriously helped!! :)
ReplyDeleteWith my camera (Panasonic) I can set the WB manual too. By choosing manual an then take a photo of a plain white paper the camera sets the WB after the actual lighting conditions in the room. Just a tip...
ReplyDeleteI think it's a great post. I find it very useful and I always love to learn something new.
ReplyDeleteGreat post! I need to learn more about photography:) Love your tips and can't wait for the 2nd part:)
ReplyDeleteKajalpennan's tip is another one, however, not entirely fool proof. ;) If you're not familiar with the manual white balance option, it's always easier to use a preset like the ones I'm showing in the post.
ReplyDeletewow- what an awesome post - I will definitely be playing around with my camera tonight.
ReplyDeleteThank you for taking the time to do this write up
You were watching my dreams! Lol. Awesome. I was just thinking earlier this week "I wonder if any of the nail blog ladies have a tut on how they take their photos."
ReplyDeletei think the set-your-own-white-balance (???) on the far right is quite useful and it is my go-to especially since i generally photograph on a white background or have some white paper handy. you just have to make sure your white object fills the center marked square and push the indicated button (DISP on my Canon).
ReplyDeletei think it's worth adding what you said about this in the SLR article to this one as others are beginning to link to your totally awesome pair of posts. (:
Geeky Dior Girl: Great minds think alike! xD <3
ReplyDeletepfefi: You're absolutely right, I should, I just need to take the time and energy... ;) And I have to add I still think that the custom white balance option isn't always the best. as soon as you move away from that very spot you were in while setting wb, the conditions change enough to f*** up the colors. Whereas, I find that using the presets are way more forgiving and have somewhat larger ranges. I will look into adding this though. :)
So... which one of your pictures above is the accurate color? I have this same camera but still can't seem to get the color accurate in any of the white balance presets...
ReplyDeleteAnother Bottle of Polish: The third one, cloudy. Most of the time it's really impossible to get reality to stick to a camera lens. You'll just have to accept that it might be slightly off, and unfortunately, the more expensive your camera is, the more accurate the photos will be. "Our" camera is rather cheap, and this is the way we'll come closest to reality in our photos.
ReplyDeleteWow, thanks for the quick response! Okay, thanks, so closest estimation. I was getting frustrated because I look at my nails, and then look at the camera screen and am never able to match - even outdoors in sunlight.
ReplyDeleteThank you so much for this post! I played around with this today and the difference in my pictures is like night and day. BTW, love your blog!
ReplyDelete